Showing posts with label Tutorial. Show all posts

Wednesday, August 21, 2013

Loose Curls YouTube Tutorial!

Hello Ladies! 
Here is a YouTube Tutorial that I filmed nearly a year ago.. but have just uploaded now. Procrastination much? Anyways, I hope you enjoy! 

My YouTube channel is TheDanielleVaughn!


Thursday, March 29, 2012

How I Achieve Platinum Blonde Hair!

Hello everyone! I recieved a request from Jessy from Liner and Lashes for a tutorial on how I get my hair the white-ish blonde that it is. I have gotten a lot of compliments on my hair color and questions on if I get it done at the salon or how I do it myself. The answer is that I dye my hair myself. 

First I want to give you a brief history on my hair..
My hair color, when I was a child, used to be a light golden blonde. As I got older, it faded out into a dirty gray blonde (ew). The first time I "colored" my hair was in 6th grade when my mom bought one of those "Do it yourself highlighting kits" from the store and put blonde streaks through my hair. That was what started my blonde kick. After that I discovered "Sun-In" and I continued to use that to lighten my hair until I went to a hairdresser and was told that using Sun-in often would damage my hair. I continued going to salons asking for highlights, or malibu treatments, or just plain dye that would achieve a white, ashy, blonde hair color. I absolutely hate my hair when it comes out with a orange or golden tint. After paying $50 dollars each month for my hair and not seeing the results that I wanted, I decided to try dying my hair myself. I went to Sally's and pick up some bleach and toner and the combination turned out to be perfect! I can finally have my white platinum hair at half the cost of going to local salons! 

The process is quite easy but I want to let everyone know that trying to go this blonde can sometimes not turn out perfectly. If you do not get the process right for your hair, it will turn out orange. Bleaching your hair is also very damaging and drying. The results turn out much better on virgin hair, or the hair at your roots. I have tried this process on my grown out, previously dyed hair and it does not turn out the same way.
  I recommend doing a strand test before trying this process out on your whole head. 
I do NOT recommend this to anyone who has medium brown to black hair, or those with red hair. Your hair will most likely turn out orange. I also do not recommend this for those who have not dyed their own hair before or are unfamiliar with the process and mixing. If you do not dye your own hair, but still would like the same result, suggest this to your usual hairdresser. This is just what works for me, it is not right for everyone. 


Supplies 
All can be found at Sally's Beauty Supply.


I use just the standard mixing bowl and brush as well as gloves. 

The bleach that I use is Loreal's Quick Blue. This bleach is tinted to a light blue color which helps to eliminate yellow tones. This is sold in either packets or a big tub. The packets, which I buy, are around $3.

 With the bleach, I use a 30 volume developer. This volume helps to lift the hair color several levels lighter than my natural color. 
The toner that I use is Wella's T18 (or white lady as it used to be called). It is a purple colored toner which really is the key ingredient in eliminating yellow and orange tones after bleaching and achieving the bright white color. This is also used with the 30 volume developer. 

The Process
When dying my hair, I never overlap the color on previous colored hair. I also like to color my hair a day or two after shampooing because I feel that it helps when the natural oils in my hair are still present.

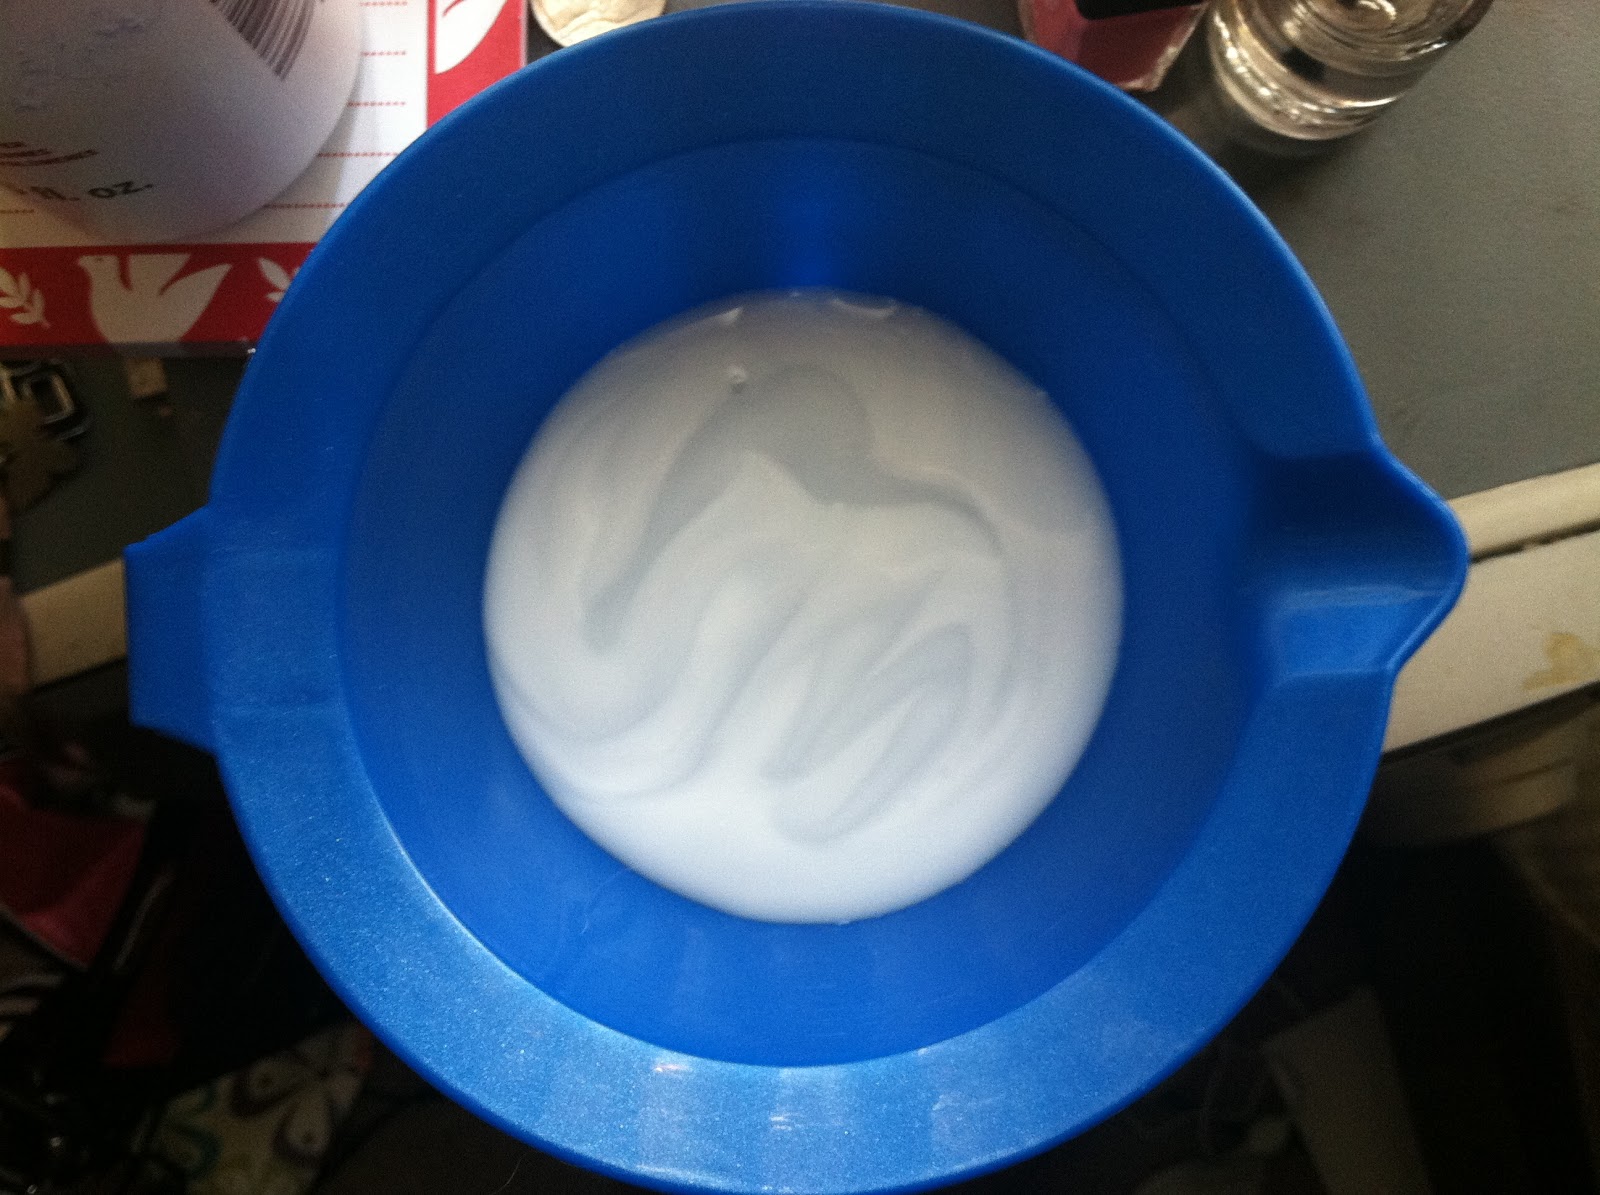
I first pour the developer into the mixing bowl. For on the scalp applications, you are supposed to mix 1.5 to 2.5 fl oz.s of developer with the bleach. I mix them together until there is a thick "cottage cheese like" consistency. 


I then apply the bleach using the Sally's brush to the roots of my hair. 
I leave this on my hair for usually 50 minutes. I do not use heat or wear a cap over my hair.

And here is how it looks like on.. haha

After the bleach has been on for about 50 minutes, I jump in the shower and wash my hair using shampoo.
I do not use conditioner.

Here is what my hair looks like just after washing out the bleach. 

It is now time for the toner
For the toner I mix it by 1 part toner to 2 parts of the developer

I then apply this to whatever area that I bleached and leave it on for 10 to 15 minutes.
This part can be kind of scary because the toner is straight purple. But I promise it does not turn your hair purple unless you leave it on a long time. haha

After the toner has had time to develop, I jump in the shower again to shampoo and condition my hair. 
The process is now done! 
Here is what my hair looks like right after washing the toner out. 

The Results!
Platinum Blonde Hair!

Maintenance
Keeping ash blonde hair from turning orange or golden can be difficult. I find this especially hard since the apartments that I live in now have rust in the water. :( 
To keep my hair on the whiter side I use Shimmer Light's Blonde and Silver Shampoo. This stuff is amazing! It is tinted purple (very purple) so it will cancel out any gold or orange tones. I wash my hair 3 or 4 times a week and use this half of the time. It really keeps my hair looking as bright and white as possible. 

Thank you so much for reading. If you have any further questions about how I dye my hair please let me know!

Sunday, January 1, 2012

Ringin' in the New Year with a Glitter Smokey Eye.

Hello Ladies! 
I hope that everyone had a fabulous New Years Eve. Now we have made our way to 2012. "Supposedly" the  year that the world is going to end. haha. So I guess lets live 2012 like it's our last!
Yesterday, I decided to be a little adventurous and wear a silver, glittery, black smokey eye. I love the way it ended up turning out, not so much how the pictures turned out though. :( The lighting wasn't the greatest due to this gloomy Michigan weather. 
Is it almost summer yet? lol.

I know it is a little too late to try this look out for New Year's Eve, but this is also a great eye makeup look for a night out to a concert, club, etc. :)


\


To achieve this eye makeup..
I first applied my Too Faced Eye Shadow Insurance.
I then applied a matte white color under my eye brow. 
I used the MAC's eye shadows Cork and Swiss chocolate in and above my crease.
I used Urban Decay's Blackout from the Naked Palette 2 on my outter V area and blended into the crease.
I also took this black and ran it along my lower lash line. 
I took Urban Decay's YDK (also from Naked 2) and applied it to the inner corner of my eye.
As the base color on my lid, I used MAC's Electra. 
The glitter that I used is a Mary Kate and Ashley loose silver glitter that I had from back in the day. 
To apply this and make it stick, I sprayed my Make Up Forever Mist and Fix on the back of my hand.
I dipped a synthetic concealer brush in the liquid and then dipped that brush into the glitter and applied it to my lid.
I kept doing this and packing the glitter on until I reached the desired amount of glitter.
I lined my upper lash line with Sephora's waterproof smokey cream liner in black.
Applied Mascara.
I then applied Red Cherry false lashes in #43. 
After applying the false lashes, I went over my lash line again with the cream liner.


For the rest of the face..
For blush I used Tarte's Exposed.
I then contoured a little using Benefit's Hoola bronzer.
I added a bit of highlight on my cheek bones and bridge of my nose using Benefit's High Beam.
I kept my lips nude using Bare Mineral's Cream Puff lipstick. 

Here is one picture taken from last night.
Me and my non-related twin!

Monday, December 12, 2011

FOTD and Mermaid Hair How To

Hello Ladies. 
One of my good friends let me borrow her 3 barrel curling iron the other day. I have never really used one of these before so I wasn't sure how the crimpy waves would look on me. Let me tell you that I fell in love. She described it as "Mermaid Hair" I feel like it is mermaid/goddess/hippie/princess hair. Fo realz.
This look is more for the spring and summer but that doesn't mean you can't rock it in the winter time too! This would be great for something like a New Year's Eve party if you are looking to do something a little different with your hair. 
Did I mention that it is super easy?

Here is how to achieve this look! 

awkward face..
You will need two things..

1. A 3 barrel curling iron. 
I'm not sure of the exact size of t his one but it was kind of on the small side.
 Larger 3 barrels will obviously create larger waves. 

2. Any type of hair accessory connected to a bobby pin. 
I used a flower but a bow would be really cute. :)


-Take a one to two inch section of hair and place it in the 3 barrel curler towards the scalp
-Leave it in for about 10-20 seconds 
-Move from the head down towards the ends of the hair
-Don't forget to wave the ends of your hair!
-Once the all of the hair is crimped, take your bangs or hair near your face, twist it back and secure it with the bobby pin. 
I did not use any kind of hair products for this look (besides heat protectant). The waves held up really well but if your hair does not hold style very easily I would recommend a heat activated or flexible hold hair spray. 

And there ya go!

I did not have a lot going on makeup wise.
 I really was trying to go for a dramatic blush look using my new Milani blush!


Face
MUFE Matte Velvet Plus Foundation 45
Too Faced Chocolate Soliel Bronzer 
Milani blush in Red Vino

Brows
MAC e/s in Cork

Eyes
Too Faced Eye Shadow Insurance 
Urban Decay e/s Sidecar on lid and lower lash line 
MAC e/s in Embark in crease
Urban Decay e/s in Sin on tear duct area
Urban Decay e/s in Virgin as brow highlight
Clinique Lash Doubling Mascara

Lips
Nothing! 

Saturday, October 15, 2011

A Classy Date Look From Head to Toe

The Look


Breakin it down..

The Hair
I kept my hair pretty simple by just flat ironing it.
  Tease the crown of the head using a teasing comb.
Take two sections, one from each side of the head, twist them and bobby pin them back. 
This takes more of the focus off of the hair and more on the face. :)
 Finish with a flexible hold hair spray. 


The Makeup


For the eyes
Use a satin shimmery gold color all over the lid
Place a bronze shimmer color on the outer part of the eye lid blending it into the outer V area
Use a neural matte brown eye shadow in the crease 
Use a matte eye shadow a few shades lighter than your skin tone under the brow 
Take the same bronze shimmer color and smudge it on the outer region of the lower lash line
Then take the same shimmery gold color and smudge it on the inner lower lash line towards the tear duct
Apply Mascara and curl your lashes
Apply any tapered false eye lashes 

For the cheeks
Apply a bronze blush on the lower apples of the cheeks, blending towards the hairline 

For the lips
Apply any berry colored lipstick 
A berry colored lipstick is very classy without looking overdone. It is much easier to pull of than a red lip.

Key Colors


The Clothes
For this look, my key piece is the neutral blazer. 
I went with a lighter color blazer in order to not look too dark with my darker lip color.


 A simple cream colored shirt is worn under the blazer. 
To give off more of a casual yet dressy vibe I wore a dark wash pair of jeggings 


The Accessories
A leopard scarf is worn to add interest to the outfit 
(Leopard accessories are a great fall fashion trend!)


I wore simple gold jewelry pieces to add a touch of glamour. 
The spike bracelet gives a bit of edginess to the outfit. 


For my nails I went for a rich darker pink color to add a fun fall color to the outfit. 
(It looks red in the picture but I swear its not! haha)


I wore a darker bag in contrast to the lightness of the blazer and shoes. 
It has a snake skin pattern which adds a new texture to the outfit. 


And for the shoes.. I wore a pair of platform nude/beige colored pumps. 


I wore this look for my boyfriend and I's 3 year anniversary. :)
 I felt that it was very appropriate for the fall weather. It is very comfortable yet dressy and very classy.

Blazer and Pumps- Charlotte Russe
Jeggings- American Eagle
Scarf - Pacsun
Spike Bracelet- Forever 21
Purse- Jessica Simpson from TJ Maxx


I hope everyone has a good Saturday! 

Wednesday, September 28, 2011

How to: Bright Wide Awake Eyes

Everyone has those days of extreme exhaustion where all you want to do is go back to sleep. For some of us ladies that may be every day! It definitely takes its toll and shows on your face especially in the eye area. Here is a makeup look that will help you achieve that wide awake look like you got that 10 hours of sleep!

 The main key to making your eyes look brighter is a white eyeliner pencil and lighter more natural eye shadow colors. 


How to achieve this look!..

First put any eye shadow primer all over your lid!


Step 1
Line entire inner eye with a white eye liner pencil including upper and lower water line. Blend the white liner into your lower lash line to soften it a bit.

Step 2 
Take the same white eye liner pencil and line your inner tear duct area
Over that white base you created add a light pink or white shimmery eye shadow (I used Urban Decay's Sin)


Step 3
Apply  a shadow that is a shade or two lighter than your skin tone to your entire lid. A shadow with a bit of shimmer will add an extra sparkle to your eye. :) (I used Urban Decay's Sidecar)

Step 4
Add a brown color that is a couple shades darker than your skin tone to your crease area to define your crease and add dimension to your eyes. (I used Mac's Embark)

Step 5
Put a matte white eye shadow under your brow

Finally...
Curl your lashes and apply two coats of mascara to your top and bottom lashes. Apply a salmon colored concealer to your under eye circles to conceal any blue areas and bags. One of my current favorite concealers for under the eyes is Amazing Cosmetic's Amazing Concealer! 

Hope this helps. :)